Download Logic Pro X on Windows PC
Video
Related apps


Description
Do you want to make your own digital music at home with all the resources available? Or do you want to learn how to create acoustic music with digital audio software? Well, in that case, you need to Download Logic Pro X on Windows PC, which is an excellent audio tool to learn the basics of music formation on your Windows machine. Continue reading this informative blog post to become more acquainted with how you can install and download one of the best digital audio workstation software Logic Pro X for PC.
Topics covered
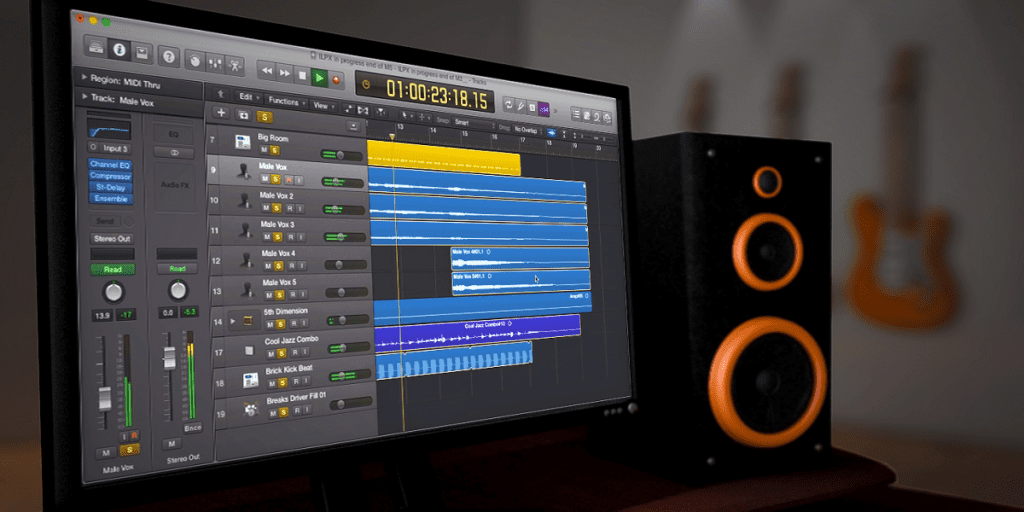
What is Logic Pro X?
Logic Pro X is developed by Apple and is exclusively available for the Mac OS. So, unfortunately despite its brilliance, the app is not available for Windows OS. It means you can not directly install or download Logic Pro X on Windows 10/8/7 PC. But no worries, it is still possible to download the Logic Pro X on your Windows PC using the free Virtualization software.
This software will imitate the settings and environment of the Mac OS High Sierra to download and run Logic Pro X on your Windows desktop. We have some good stories and audiobooks applications listed on our app store. You can visit our Music and Audio portion to download your favorite app.
Here in this article, we will share with you the simple and easiest way to download Logic Pro X on Windows in the step-by-step guide. But before that, let’s look at the technical specifications of the app.
Technical Specifications
| Name | Logic Pro X on Windows PC |
| Category | Music |
| Installations | 118,419 |
| Rating | 4.6 |
| File Size | 102 MB |
| Language | English |
| Compatibility | Windows 10/8.1/8/7/Vista and Mac OS X 10.11 |
| Developed By | Apple Inc. |
Logic Pro X is one of the highly-rated apps in the Music Category, specially designed and developed for Apple device users. With its incredible features and user-friendly interface, it has got over 118,419 app installations and really good reviews with 4.6 rating stars from the users.
How to download Logic Pro X on Windows PC?
As we have mentioned, Windows users can download the Logical Pro X with the help of Virtualization software and get the advantage of this wonderful music-making and editing app. There are numerous virtualization softwares available in the internet market to run Mac OS X, virtually on your Windows PC. But we suggest the Virtual Box as it is easier to handle and powerful software.
So don’t waste your time, download and install Logic Pro X Free on Windows 10, 8, & 7 PCs. Below we have listed the step that you need to follow to start the process.
Steps To Download & Install Logic Pro X On Windows 10/8/7:
Step 1:Download macOS High Sierra File
- First, you need to download the macOS High Sierra file from any reliable web source. The file should be in .rar format.
- After downloading the file, extract it in a folder using the extracting software WinRar.
Step 2: Download and Install The Virtual Box
The second step is to download and install Virtual Box on your Windows PC and to run it. Follow the guide here.
- You first have to enable the virtualization by changing the settings in your PC BIOS.
- Then, visit the Virtual Box official website [https://www.virtualbox.org/wiki/Downloads] and download the suitable and up-to-date version of the Virtual Box for Windows.
- Once downloading is done, use the setup.exe file to install the emulator. You just have to double-click on it and follow the installation steps given on the screen.
- Now, Virtual Box is set to be used.
Step 3: Set Up a Virtual Machine
When you have finished the installation, you need to use it to set up a Virtual machine. Make sure that you check all these steps:
- Run the Virtual Box on your PC and click the “Machine” tab.
- Then select the “New” option.
- Enter the Name.
- For the version, choose the macOS 10.13 High Sierra 64-bit.
- Select the RAM size (4GB recommended-at least 50% of your real RAM) and then click the Next option.
- In the Hard Disk Window, choose the “Use an existing virtual hard disk file”.
- Hit the folder icon to pick the virtual hard disk file.
- Click the “Add” option in the new opening Mac-Hard Disk Selector dialog box.
- Here select the macOS High Sierra file which you have downloaded and extracted earlier.
- Then click the “Choose” button.
- At last tap on the “Create” option.
Step 4: Edit The Settings of Your Virtual Machine for MAC OS Setup
Now you need to highlight the settings of the Virtual Machine that you have shaped.
- Choose the newly created Virtual Machine on Virtual Box.
- Select the “Settings” icon.
- Then click the System settings tab.
- Go to the Motherboard option in the System settings.
- Uncheck the “Floppy” and “Network” options.
- Choose the Chipset as‘‘ICH9’’.
- Next, click the Processor option.
- Select the CPU at least 2 (Max:50% your real machine’s processor).
- Now click the Display setting and open the screen tab.
- Set the Video memory to 128 MB.
- Then click the “OK” button.
Step 5: Add Code to Your Virtual MachineThrough CDM
- Go to the start menu and find the CDM.
- Right-click on it and select the “Run as administrator” option.
- Now enter the CDM codes provided below and change the“Machine Name’’ with the name of your Virtual Machine.
cd “C:\Program Files\Oracle\VirtualBox\”
VBoxManage.exe modifyvm“Machine Name” –cpuidset 00000001 000106e5 00100800 0098e3fd bfebfbff
VBoxManagesetextradata“Machine Name” “VBoxInternal/Devices/efi/0/Config/DmiSystemProduct” “iMac11,3”
VBoxManagesetextradata“Machine Name” “VBoxInternal/Devices/efi/0/Config/DmiSystemVersion” “1.0”
VBoxManagesetextradata“Machine Name” “VBoxInternal/Devices/efi/0/Config/DmiBoardProduct” “Iloveapple”
VBoxManagesetextradata“Machine Name” “VBoxInternal/Devices/smc/0/Config/DeviceKey” “ourhardworkbythesewordsguardedpleasedontsteal(c)AppleComputerInc”
VBoxManagesetextradata“Machine Name” “VBoxInternal/Devices/smc/0/Config/GetKeyFromRealSMC” 1
- Now your Virtual Machine is ready.
Step 6: Setup macOS
To set up the Mac operating system, follow the steps below.
- Go back to the Virtual Box and run it.
- Choose your own created Virtual Machine.
- Then click the ‘‘Start’’ button and load the Mac interface.
- Follow all the given instructions given on the screen to set up the macOS.
- Add your Apple ID to log in.
- Once all the above steps are completed, the system begins downloading the Mac.
- Now, open the App Store and search for Logic Pro X which you want to install. You will see the search results for the app. Click to install it.
- Finally, enjoy Logic Pro X on your Windows laptop or PC free of cost.
Download Logic Pro X on Windows PC – Conclusion:
Logic Pro X has gained huge popularity with its simple yet effective interface. Now it is available to use on your Windows PC/laptop with help of Virtual Emulator. We have stated the best and safe method to download Logic Pro X free for Windows.
I hope you have installed the app correctly on your PC. If you have any queries or suggestions related to installing Emulators or Logic Pro X for Desktop, please let us know through comments. We are waiting for your precious remarks because your satisfaction is our first priority.
Images


Developer's apps


Latest Apps
Best Rated Apps


